schedule
User can project some events according to the setting of schedule table.For example,a factory starts machines at 8:00 am,and closes machines at 18:00pm on weekday.
Click “Schedule Table”on “Standard List”,it will pop up a schedule table dialog,as shown follow.

Figure 7-49 Schedule table dialog
Click”New”button,pop up a new dialog,as shown follow.The General page is first display.
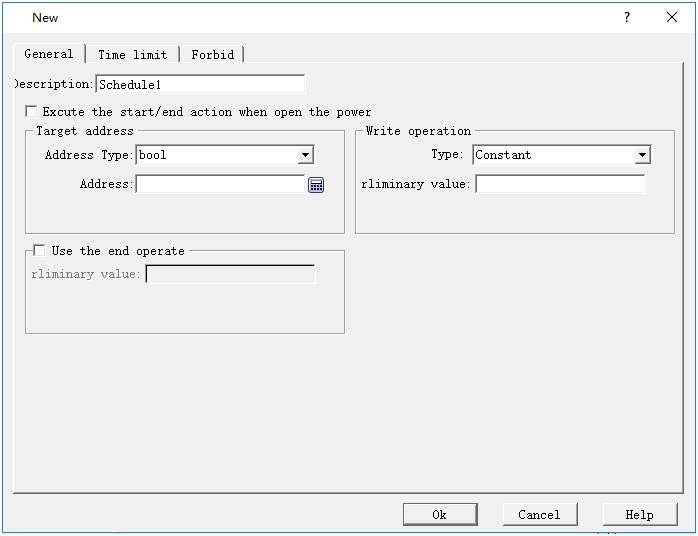
Figure 7-50 New schedule table dialog
Ø Description:
Input text here in order to convenient for users to understand this schedule table’s function.
Ø Execute the start/end action when open the power:
If the power(HMI)open time is after the start time,Execute the start/end action.
Ø Target address:
Input the target address type and address,the value of address will be wrote when the start/end time occurs.
Ø Write operation:
Type include “Constant”and”Address”.Below “Constant” type corresponds to Value that be wrote to target address.Below “Address”type corresponds to a address edit,the value of address will be wrote to target address value when start/end time occurs.
Ø Use the end operate:
If this section is selection,the value of write operation will be wrote in target address when end time occurs.
After setting General,Click”Time limit”page, as shown follow.
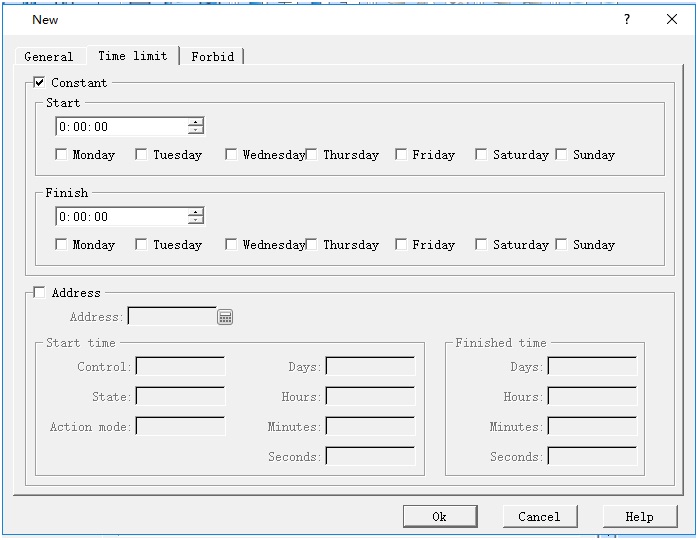
Figure 7-51 Time limit page
Ø constant: Check the Start/Finish time,when the tomes occur,it will operate the relevant write-in。
Ø Address:Using a piece of address to control the schedule table’s start and end time,as shown follow。
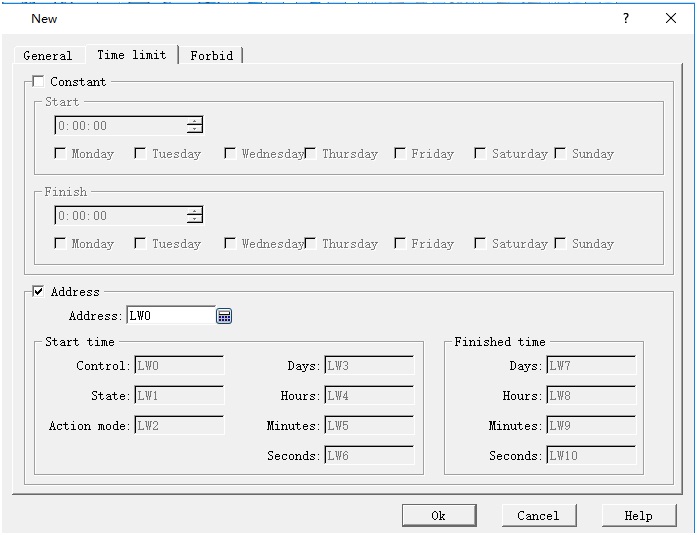
Figure 7-52 Setting address control
For example ,the address set to LW0,LW0~LW10 are used to schedule address.
LW0:Control address,when LW0 == 1,the schedule time is loaded on HMI.Schedule element starts work.After Loaded on,LW0 was reset to 0;
LW1:Schedule state,when schedule time is loaded(LW0==0),LW1 would be set to 1。
LW2:Action mode,when LW2 is set to 1, if current time is after the start time,operate the write action。If LW2 is 0,when current time equals the start/end time,it will operate start/end operation.
LW3:the value indicates the day of start time,it’s value equal to 2^(number of week),LW3 = (0,1,4,8,16,32,64)
LW4~LW6:the start time’s hours,minute,seconds.
LW7:the value indicates the day of finished time,it’s value equal to 2^(number of week),LW3 = (0,1,4,8,16,32,64)
LW8~LW10:the finished time’s hours,minute,seconds.
Analogous,when LWn is set to control address,LWn~LWn+10 are used to schedule address,just like above。
Tips:If checked Address,Don’t foget to set the control address to 1 in order to loadthe schedule after set the start/finished time.Otherwise,the schedule wouldn’t work.
Fobid page,as shown follow:
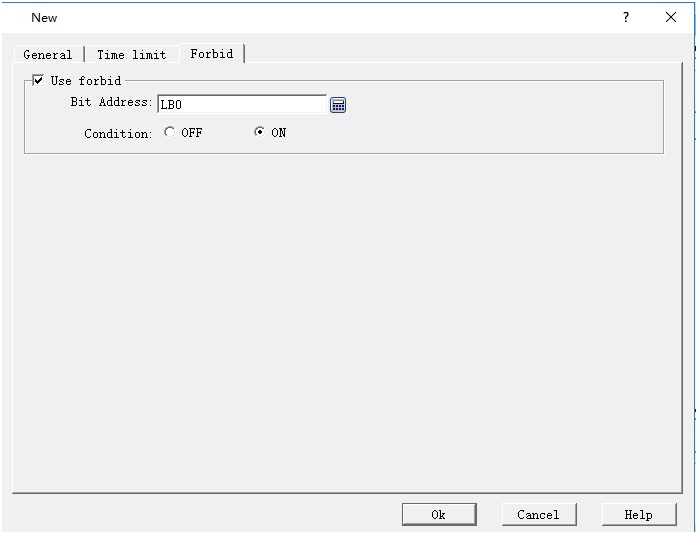
Figure 7-53 Forbid page
If check “use forbid”,when the bit address suit the condition(0 or 1),schedule can work.
After setting new dialog parameter,click “ok”,create a element of schedule table,as shown follow.
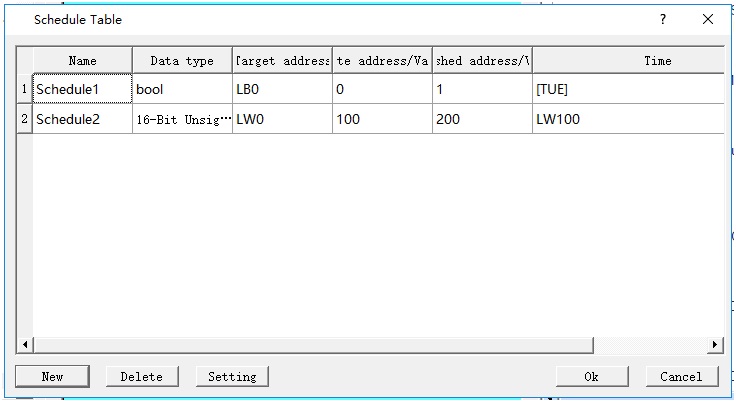
Figure 7-50 Created schedule table